Pinta is a lightweight image editor for Linux and is far more easier to handle than Gimp. It can be used for quick editing like resizing images or adjusting the colours of photographs, but also for more professional tasks which depend on layered images and more. It is a good mixture between MS Paint and professional image editing tools and is recommendable for most purposes of image-editing-everyday-use.
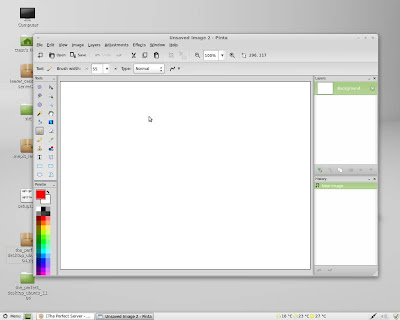
On first start Pinta appears as a single window with a large central drawing panel. On the left side, there is a Tools and a Palette panel, on the right side, there is a Layers and a History panel. On the top windowbar you can find the usual editing options for adjusting colors, brightness and others as well as adding effects to your images.
I will create a simple picture using some of the basic tools and effects. Start by selecting the Paintbrush tool and adding some colors to the first layer of the picture.
To make sure that you do not damage the previously created parts of a picture you use different layers. This feature allows you to part the picture into layers, which all act as seperate pictures with a transparent background. Using these one can draw anything on a single layer and erase it again without touching the content of the other layers. To add a new layer, select Layers > Add New Layer.
Now you have an additional layer which you can use to seperate your background from the rest of the picture. To choose other colors to use, double-leftclick upon the primary color and a window will open where you have detailed options to select a color.
After applying some color to the second layer you can watch these alone by hiding the other layers. Therefore just uncheck the checkboxes next to the layers' names on the Layers panel to the right.
To make my current layers look more like a background I will apply a Gaussian Blur to it. Therefore I select Effects > Blurs > Gaussian Blur... and select a radius that matches my likings.
By using the Merge layer down button on the Layers panel you can merge the currently selected layer with the one beneath it. I do that to combine my background layers to one single layer. Next I create a new layer to create my foreground.
If you work on more detailed objects it is always a good choice to use a new layer for every seperate object you add to the picture. To edit the opacity of a layer, select Layers > Layer Properties... and adjust the layer's opacity.
I need to do that to make my bug's wings transparent. To make its eyes look more partitioned, I use the Tile Reflection distort effect. Select Effects > Distort > Tile Reflection...
and adjust it to the level you need.
I need to do that to make my bug's wings transparent. To make its eyes look more partitioned, I use the Tile Reflection distort effect. Select Effects > Distort > Tile Reflection...
and adjust it to the level you need.
If you want to save your image as a project file, meaning wanting to save the image as seperated layers but not as merged image, you can use the OpenRaster image format (*.ora) which saves your current image seperated in layers so you can open it again later and continue your work.
Apart from the features I used to create and edit my image you have a large variety of different ones to choose from, as the Artistic effects which you can find in most higher quality creative editors and which let you edit your image to look more like an oil painting or different styles. Then there are the Blurs, I already used the Gaussian Blur in my image, however there are far more than just this one, for example the Motion Blur, the Radial Blur or the Unfocus. There are also more possibilities of distorting your images as making
them twist or bulge into different directions. You can also sharpen your image or vary its color properties to adjust the mood to your likings. Here is an example of what you can accomplish by just drawing a very few lines with a greater brush and adding some effects to it:
Related Posts:
How to install and configure Apache, PHP, MySql and phpMyadmin on Linux
How to Use Ubuntu 11.10
How to use Google Docs


Comments
Post a Comment